Yes and it is on the latest version too :is there anyone have installed the saas version ?


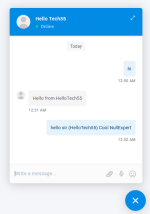
And here is Boxcoin as well :

Last edited:

Yes and it is on the latest version too :is there anyone have installed the saas version ?
Highly recommended and very professionally done.
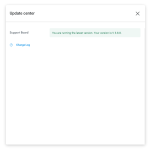
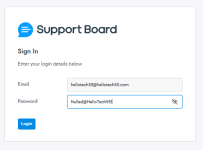
See my reply, it’s a bit complex to setup and these files won’t work for you for SaaSi have error when login
/account/ajax.php:1
Failed to load resource: the server responded with a status of 500 ()
If you are interested in Support Board SaaS installation contact me via email : [email protected]Can anyone help with installing the saas version? Please email me at [email protected]
05/07/2025 | Support Board | V 3.8.2
Bug Fixed bug related to duplicated messages from email piping.
Bug Fixed bug related to user login via chat widget.
Bug Fixed bug related to unsuccesfull WordPress admin login.
Bug Fixed bug related to email notifications.
New feature Option to filter conversations by agent.
Optimization Assign an agent to multiple conversations at once.
Yes and it is on the latest version too :
View attachment 50204
View attachment 50205
*** Hidden text: cannot be quoted. ***
And here is Boxcoin as well :
View attachment 50206
*** Hidden text: cannot be quoted. ***


v3.8.3 is the latest SaaS - Sadly none of the nulled ones out there works out but yea it is what it is.Dear author please update, newer version have big performance improvements
")
Not Nulled (Admin to Help)
where we can find this update?Hello,
25/09/2025 | Support Board | V 3.8.4
Bug
Fixed bug related to flesh notifications for admin area.
Bug
Fixed bug related to RTL on admin area.
Bug
Fixed bug related to messages assigned to wrong senders when agents or admins are deleted.
New feature
Email piping now sends replies from the same email piping address the conversation was created with.
25/09/2025 | Artificial Intelligence App | V 1.5.5
New feature
Tools calling is now available as new flows block.
New feature
Users now have the ability to navigate between flow's steps and revise previously entered details in a conversational way.
New feature
The flows buttons list block has been replaced with choices, which can now handle responses detected in a conversational manner.
New feature
Option to enable a flow only for specific sources and departments.
New feature
New GPT models added: gpt-5-nano, gpt-5-mini, gpt-5.
Optimization
Improved playground: responses now closely match chat responses.
Optimization
Flows behavior improved: if input is requested from the user but not provided, the chatbot will keep prompting until it is received.
Optimization
Improved OpenAI performance: faster responses and less API calls.
Optimization
Note summary is now provided in the same language of the agent.
Optimization
Human takeover across all messaging apps, including WhatsApp, Messenger, Telegram, and others, now works with any text reply confirming the request.
Info
The default OpenAI model is now gpt-5-mini.
Support Board v3.8.7 Nulled
Download Link:
*** Hidden text: cannot be quoted. ***
Download Password:
*** Hidden text: cannot be quoted. ***
(Readme.txt)
Support Board v3.8.7 Nulled
Just install & enjoy!
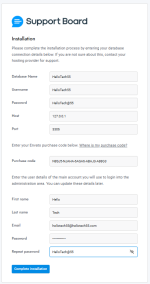
Installation Instruction
1. Upload & Extract to instal Dir
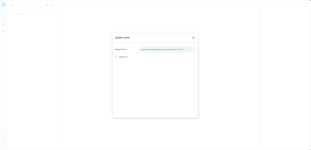
2. Go to https://your-site.com/admin.php
3. Fill out the form with your DB_Name, DB_User, DB_Password, DB_Host (localhost/127.0.0.1), DB-Port(3306), Admin User Details (FirstName, LastName, Email., Password)
4. Click Continue
5. Now, Login witht he Admin User details (Email & password) used during installation
6. Note: After Successfull Installation, Rename ".htaccess.txt" into ".htaccess"
7. Now Paste the below Code (js/min/main.min.js) in the page wherever you want to display Chat Widget just befor </body> tag
Warnig: If jQuery (js/min/jquery.min.js) already imported then you do not need to import jQuery again
For Chat Widget:
<script src="https://your-site.com/js/min/jquery.min.js"></script> Tip: Do not paste jQuery if already imported
<script id="sbinit" src="https://your-site.com/js/min/main.min.js"></script> Tip: This is the js file to display Chat Widget
For Tickets:
<script id="sbinit" src="https://your-site.com/js/min/main.min.js"></script>
<script id="sbinit" src="https://your-site.com/js/main.js?mode=tickets"></script> Tip: This is used to display Ticket
Tip: "your-site.com" is your support-board-install-dir, so replace "your-site.com" with your own install-dir
Purely Nulled by HelloTech55
Warning: This is purely for educational purpose only
Thanks!
Enjoy!
Hint: Please Support the developers, because it requires huge hard works and dedication as well as patience to create something very useful.
Credit: HelloTech55 (hellotech67389)
Support Board v3.8.7 Nulled
Download Link:
*** Hidden text: cannot be quoted. ***
Download Password:
*** Hidden text: cannot be quoted. ***
(Readme.txt)
Support Board v3.8.7 Nulled
Just install & enjoy!
Installation Instruction
1. Upload & Extract to instal Dir
2. Go to https://your-site.com/admin.php
3. Fill out the form with your DB_Name, DB_User, DB_Password, DB_Host (localhost/127.0.0.1), DB-Port(3306), Admin User Details (FirstName, LastName, Email., Password)
4. Click Continue
5. Now, Login witht he Admin User details (Email & password) used during installation
6. Note: After Successfull Installation, Rename ".htaccess.txt" into ".htaccess"
7. Now Paste the below Code (js/min/main.min.js) in the page wherever you want to display Chat Widget just befor </body> tag
Warnig: If jQuery (js/min/jquery.min.js) already imported then you do not need to import jQuery again
For Chat Widget:
<script src="https://your-site.com/js/min/jquery.min.js"></script> Tip: Do not paste jQuery if already imported
<script id="sbinit" src="https://your-site.com/js/min/main.min.js"></script> Tip: This is the js file to display Chat Widget
For Tickets:
<script id="sbinit" src="https://your-site.com/js/min/main.min.js"></script>
<script id="sbinit" src="https://your-site.com/js/main.js?mode=tickets"></script> Tip: This is used to display Ticket
Tip: "your-site.com" is your support-board-install-dir, so replace "your-site.com" with your own install-dir
Purely Nulled by HelloTech55
Warning: This is purely for educational purpose only
Thanks!
Enjoy!
Hint: Please Support the developers, because it requires huge hard works and dedication as well as patience to create something very useful.
Credit: HelloTech55 (hellotech67389)
Post automatically merged:
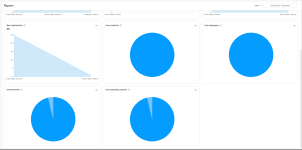
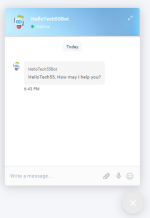
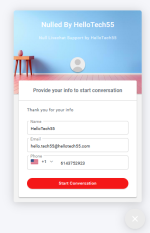
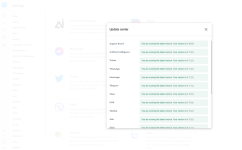
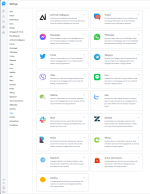
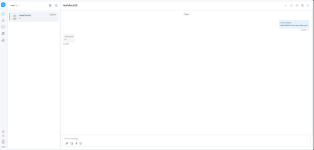
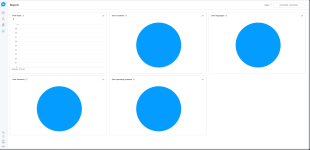
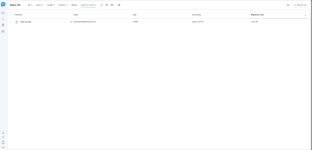
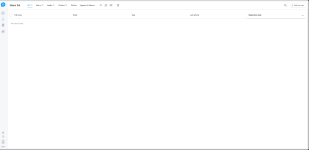
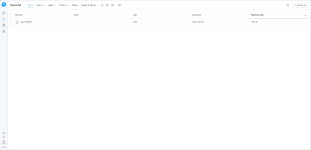
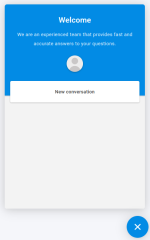
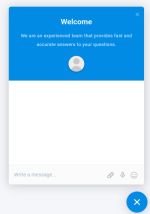
Screenshots


Support Board v3.8.7 Nulled
Download Link:
*** Hidden text: cannot be quoted. ***
Download Password:
*** Hidden text: cannot be quoted. ***
(Readme.txt)
Support Board v3.8.7 Nulled
Just install & enjoy!
Installation Instruction
1. Upload & Extract to instal Dir
2. Go to https://your-site.com/admin.php
3. Fill out the form with your DB_Name, DB_User, DB_Password, DB_Host (localhost/127.0.0.1), DB-Port(3306), Admin User Details (FirstName, LastName, Email., Password)
4. Click Continue
5. Now, Login witht he Admin User details (Email & password) used during installation
6. Note: After Successfull Installation, Rename ".htaccess.txt" into ".htaccess"
7. Now Paste the below Code (js/min/main.min.js) in the page wherever you want to display Chat Widget just befor </body> tag
Warnig: If jQuery (js/min/jquery.min.js) already imported then you do not need to import jQuery again
For Chat Widget:
<script src="https://your-site.com/js/min/jquery.min.js"></script> Tip: Do not paste jQuery if already imported
<script id="sbinit" src="https://your-site.com/js/min/main.min.js"></script> Tip: This is the js file to display Chat Widget
For Tickets:
<script id="sbinit" src="https://your-site.com/js/min/main.min.js"></script>
<script id="sbinit" src="https://your-site.com/js/main.js?mode=tickets"></script> Tip: This is used to display Ticket
Tip: "your-site.com" is your support-board-install-dir, so replace "your-site.com" with your own install-dir
Purely Nulled by HelloTech55
Warning: This is purely for educational purpose only
Thanks!
Enjoy!
Hint: Please Support the developers, because it requires huge hard works and dedication as well as patience to create something very useful.
Credit: HelloTech55 (hellotech67389)
Post automatically merged:
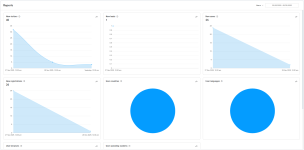
ScreenshotsPost automatically merged:
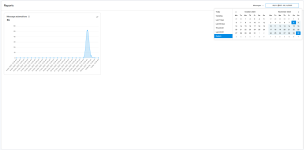
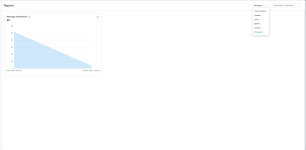
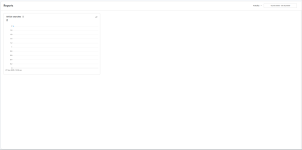
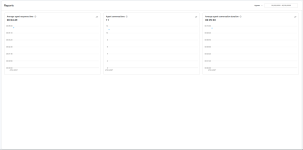
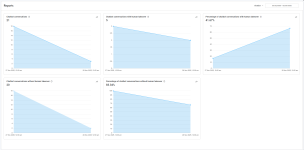
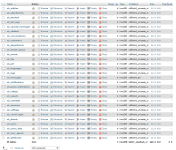
More Screenshots
can this version be upgraded from the old version?Some More Screenshots
Some more screenshots from Support Board v3.8.7
Yes buddy, but you need to be alert at some points.... Then you can easily upgrade from the existing version...can this version be upgraded from the old version?
/* [extra] */
/* Cross-Origin Domain Support */
define('SB_CROSS_DOMAIN', true); {{-- Tickets Card --}}
<div class="hellotech55-ticket-card fade-in-on-scroll">
<div id="sb-tickets"></div>
<script>SB_TICKETS = true;</script>
<script id="sbinit" src="https://your-site.com/js/main.js?mode=tickets"></script>
</div>
I have already implemented a nulled SaaS version that functions reliably in a VPS environment, using a LocalDB when a CloudDB is unavailable.Can anyone help with installing the saas version? Please email me at [email protected]